QUALITY CONTROL
Modern assembly lines
and strict multiple quality inspection procedures.

01
Basic Dimension Inspection
Our company strictly implements the whole process quality control. Each process is equipped with a professional inspection inspector, and a full-time inspector is set up in the assembly process to carry out 100% inspection of key dimensions, axial radial clearance, tooth runout, end face and radial runout and other parameters required by the drawings. Through multi-level precision measurement and data recording, we ensure that the products fully comply with the design standards, guarantee the high reliability, long service life and stable performance of the slewing bearings, and deliver zero-defect quality products to our customers.

03
Hardening Quality Inspection
Our company strictly conducts destructive sampling inspection at a ratio of 5 per thousand for the quenching process of raceways and teeth, and accurately inspects the surface and core hardness and depth of hardened layer. Through metallographic analysis to ensure that the quenching hardness (e.g. HRC58-62) and uniformity of the penetration layer fully meet the standards, combined with the hardness gradient test to verify the stability of the quenching transition zone. Data-based control eliminates defects such as soft spots and overburning, and guarantees the wear resistance, fatigue resistance and long-lasting bearing capacity of the slewing bearing.

05
Loading capacity and surface treatment testing
For ultra-thin large flange slewing bearings (> 500mm), our company performs a 500KG load rotation test to ensure that they still operate flexibly and without stagnation under high carrying capacity. Surface treatment, painting, galvanizing and other processes are completed by a professional third party, and the coating thickness, adhesion and other parameters are strictly tested to ensure that the anti-corrosion and wear-resistant performance is up to standard. Through double strict control, taking into account the structural strength and appearance durability, to ensure the reliable performance of slewing bearings in extreme environments.
Strictly Control SWBTEC Slewing Rings’ Quaility
SWBTEC quality has two quality certified and recognized, one is ISO9001: 2008, the other is our internal quality control system.

02
Threaded Hole Inspection
Our company strictly follows the ISO standard and implements all-around inspection on the threaded holes of slewing bearings. In addition to the basic hole diameter measurement, we control the thread diameter accurately (e.g. M14 tolerance 11.835-12.210mm), manually test the smoothness of screwing in by using through and stop gauges, and simulate the working conditions to verify the thread adaptability from the reverse of the mounting surface. Double testing ensures thread accuracy and assembly reliability, eliminating the risk of wrong buckle and slippery wire, and guaranteeing the long-term stable operation of slewing bearings under complex working conditions with high-precision processing and strict quality control.

04
Roughness Inspection
Our company adopts high-precision profilometer to implement precision monitoring of tooth and raceway surface roughness. The roughness of teeth after quenching is strictly controlled at ≤2.5μm, and the roughness of raceway reaches the ultra-precision standard of ≤0.8μm. Through periodic testing and data comparison, we ensure the surface finish is uniform and stable, effectively reduce friction loss, improve the smoothness and durability of the slewing bearing operation, and ensure the long-term and efficient operation of the equipment with micron-level precision.
QUALITY CONTROL
Modern assembly lines and strict multiple quality inspection procedures.
Strictly Control SWBTEC Slewing Rings’ Quaility
SWBTEC quality has two quality certified and recognized, one is ISO9001: 2008, the other is our internal quality control system.

01
Basic Dimension Inspection
Our company strictly implements the whole process quality control. Each process is equipped with a professional inspection inspector, and a full-time inspector is set up in the assembly process to carry out 100% inspection of key dimensions, axial radial clearance, tooth runout, end face and radial runout and other parameters required by the drawings. Through multi-level precision measurement and data recording, we ensure that the products fully comply with the design standards, guarantee the high reliability, long service life and stable performance of the slewing bearings, and deliver zero-defect quality products to our customers.

02
Threaded Hole Inspection
Our company strictly follows the ISO standard and implements all-around inspection on the threaded holes of slewing bearings. In addition to the basic hole diameter measurement, we control the thread diameter accurately (e.g. M14 tolerance 11.835-12.210mm), manually test the smoothness of screwing in by using through and stop gauges, and simulate the working conditions to verify the thread adaptability from the reverse of the mounting surface. Double testing ensures thread accuracy and assembly reliability, eliminating the risk of wrong buckle and slippery wire, and guaranteeing the long-term stable operation of slewing bearings under complex working conditions with high-precision processing and strict quality control.

03
Hardening Quality Inspection
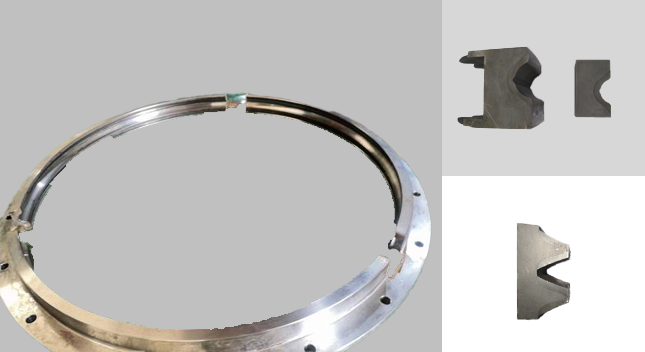
Our company strictly conducts destructive sampling inspection at a ratio of 5 per thousand for the quenching process of raceways and teeth, and accurately inspects the surface and core hardness and depth of hardened layer. Through metallographic analysis to ensure that the quenching hardness (e.g. HRC58-62) and uniformity of the penetration layer fully meet the standards, combined with the hardness gradient test to verify the stability of the quenching transition zone. Data-based control eliminates defects such as soft spots and overburning, and guarantees the wear resistance, fatigue resistance and long-lasting bearing capacity of the slewing bearing.

04
Roughness Inspection
Our company adopts high-precision profilometer to implement precision monitoring of tooth and raceway surface roughness. The roughness of teeth after quenching is strictly controlled at ≤2.5μm, and the roughness of raceway reaches the ultra-precision standard of ≤0.8μm. Through periodic testing and data comparison, we ensure the surface finish is uniform and stable, effectively reduce friction loss, improve the smoothness and durability of the slewing bearing operation, and ensure the long-term and efficient operation of the equipment with micron-level precision.

05
Loading capacity and surface treatment testing
For ultra-thin large flange slewing bearings (> 500mm), our company performs a 500KG load rotation test to ensure that they still operate flexibly and without stagnation under high carrying capacity. Surface treatment, painting, galvanizing and other processes are completed by a professional third party, and the coating thickness, adhesion and other parameters are strictly tested to ensure that the anti-corrosion and wear-resistant performance is up to standard. Through double strict control, taking into account the structural strength and appearance durability, to ensure the reliable performance of slewing bearings in extreme environments.
CERTIFICATES


Comprehensive Quality Control
All key components undergo strict inspection, including gear precision, hardness, and raceway smoothness. Advanced testing tools ensure every bearing meets our high standards before shipment.

Certified for Global Applications
We also support custom quality requirements and third-party testing. No matter the industry — robotics, mining, or packaging — our products meet both international standards and client expectations.
 SWBTEC


Get a Quote